Converting an older router into an Access Point can help you increase wireless coverage in your home at no additional cost. DD-WRT is Linux-based open source firmware for wireless routers and access points. Originally designed for the Linksys WRT54G series, it now runs on a wide variety of router manufacturer models.
Some websites recommend that you first perform a 30-30-30 reset in order to clear existing settings and restore default settings. I have performed the following instructions on two D-Link 880L routers without having to perform a 30-30-30 reset. If you want to perform a reset, there are risks involved if not done properly. If you want to do this, follow the instructions on the DD-WRT Wiki.
Connect to the router Web interface by typing the router’s IP address in the browser URL. The default is 192.168.1.1.
1. Select the Setup -> Basic Setup Tab
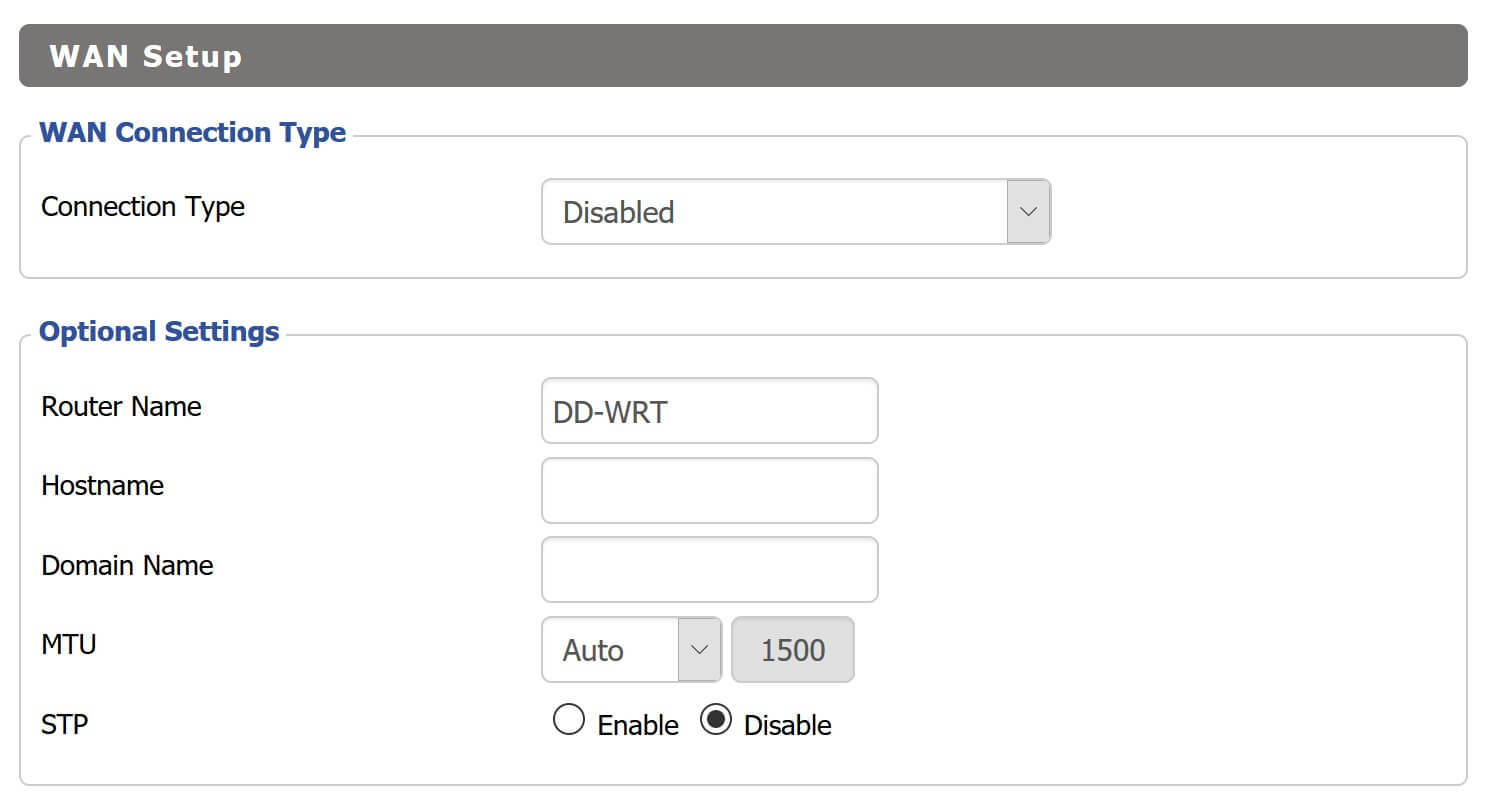
- WAN Connection Type: Disabled
- STP: Disabled

- Local IP Address: Use the same subnet as the primary router, but outside the primary router’s DHCP assignment range e.g. 192.168.1.2. I also recommend assigning a static IP address to the Access Point in the primary router based on the Access Point’s MAC address.
- Subnet Mask: Same as the subnet used on the primary router e.g. 255.255.255.0
- Gateway: IP address of the primary router e.g. 192.168.1.1
- Local DNS: IP address of the primary router e.g. 191.168.1.1
- Assign WAN Port to Switch: Uncheck

- DHCP Type: DHCP Server
- DHCP Server: Disable
- Use DNSMasq for DHCP: Uncheck
- Use DNSMasq for DNS: Uncheck
- Recursive DNS Resolving: Uncheck

- NTP Client: Enable or Disable. If enabled, specify the Gateway and Local DNS per the instructions above.
- Click Save at the bottom of the page
2. Select the Setup -> Advanced Routing tab

- Change operating mode to: Router
- Select Save at the bottom of the page
3. Select the Wireless -> Basic Settings Configure the settings for the 2.4 Ghz and 5 Ghz channels.
- Wireless Mode: AP
- Wireless Network Mode: Choose the appropriate mode for the clients in your network. If you have devices that support N, select N-only to achieve the best performance
- Wireless Network Name (SSID): Enter the network name
- Wireless Channel: Choose a channel that has the least amount of use for your area. Channels 1, 8 or 11 will give you the best performance for the 2.4 Ghz band.
- Channel Width: Select 20 Mhz for the 2.4 Ghz band. Select Wide HT40 for the 5 Ghz band.
- You can choose to Enable or Disable the remaining wireless options. The settings you choose depend on what options your router supports. Some routers may not support all of the features. Airtime Fairness and Optimize Multicast Traffic has caused problems for some users.
- Network Configuration: Bridged
- Select Save at the bottom
4. Select the Services -> Services tab

- DNSMasq: Disable

- ttraff Daemon: Disable
- Select Save at the bottom
5. Select the Security -> Firewall tab

- SPI Firewall: Disable
- Uncheck the remaining boxes in the Additional Filters, Block WAN Requests and Impede WAN Dos/Bruteforce sections

- Warning Notifier: Disable
- Select Save at the bottom of the page
6. Select the Administration -> Management tab
- Info Site Password Protection: Enabled (Recommended). This will prevent the Access Point’s site information from being displayed when the Access Point’s IP address is entered in a browser.
- Routing: Disabled
- Select Save at the bottom of the page
7. Connect an Ethernet cable from one of the primary router’s LAN ports to the Access Point WAN port and reboot the Access Point.
8. If you need to access the Web interface of the Access Point, type the IP Address you assigned the Access Point in a browser e.g. 192.168.1.2.